

Views: 0 Author: Site Editor Publish Time: 2026-09-22 Origin: Site


Water leakage from a degraded shower enclosure accelerates structural damage, making seal replacement a high-ROI maintenance task. However, ordering based on visual estimation rather than precise measurement guarantees failure. We see it on job sites constantly: homeowners or junior technicians eyeball a gap, order a generic strip, and wonder why the floor is flooded or the door drags across the tile. Precision is non-negotiable. You are dealing with tempered glass and water under pressure. A millimeter of variance in glass thickness or gap clearance results in either a seal that cannot grip the glass, or a seal that creates excessive friction, risking door misalignment or glass shattering. This guide provides the technical framework for extracting exact measurements, identifying the correct profile, and evaluating suppliers to ensure a first-time fit for your replacement seal.
A functioning shower door seal operates on strict physical baselines. It must block water under direct pressure from a showerhead. It must allow the door to swing freely without dragging across the threshold. It also acts as a shock absorber, preventing the glass from slamming against metal strikes or adjacent panels. Achieving these operational baselines requires exact dimensional alignment between the glass panel, the replacement profile, and the surrounding architecture.
When you guess the dimensions, you invite cascading failures. Installing an undersized profile forces the rigid plastic spine over a thicker glass edge. This creates immense localized stress. Tempered glass handles blunt impacts well but shatters easily under sustained edge pressure. Add the thermal expansion of a hot shower, and a tightly bound panel can explode unexpectedly.
Conversely, an oversized profile slips down the glass. The door drags against the floor, transferring torque directly to the hinges. Over time, the hinges loosen, the door sags, and the bottom sweep fails to channel water. Water pools outside the enclosure, seeping into grout lines and rotting the subfloor beneath the tile.
You must establish strict measurement baselines before ordering parts. Always measure the bare glass and the structural opening. Never measure the old, degraded strip. Plastics shrink, warp, and harden after years of exposure to hot water and cleaning chemicals. Replicating the dimensions of a failed part guarantees a second failure. These measurement protocols apply primarily to frameless and semi-frameless enclosures where the weatherstripping mounts directly to exposed glass edges.
Precision requires the right tools. Visual estimation fails on job sites. Standard household measuring devices lack the millimeter-level accuracy required for architectural glass hardware.
Tape measures are useless for determining glass thickness. The curved metal blade introduces parallax error. Depending on your viewing angle, a 10mm panel might look like an 8mm panel. Digital calipers are the industry standard. They provide exact digital readouts down to the fraction of a millimeter, removing human error from the equation.
You also need rigid measuring tools to assess gap clearances. Feeler gauges or rigid steel rulers work best. Flexible tapes bend when pushed into tight gaps between a door and a fixed panel, distorting the true measurement. A rigid ruler allows you to measure the exact void without deflection.
Accurate measurements require a clean substrate. Buildup on the bottom edge of a door artificially inflates your thickness reading. Follow this site preparation workflow before taking any measurements:
Prioritize safety equipment during this diagnostic phase. Exposed tempered glass edges present a laceration hazard, especially when pulling off hardened plastic strips. Wear cut-resistant gloves and safety glasses. Old brittle plastics snap and send sharp fragments flying during removal.
Extracting dimensions for a glass shower door seal requires a systematic approach. Record each measurement clearly, noting both metric and imperial figures to cross-reference against supplier catalogs.
Glass thickness is the primary constraint. If this measurement is wrong, the replacement part will not fit, regardless of its other dimensions.
Apply your digital calipers to the top or side edge of the bare glass. Avoid taking measurements near chipped areas or beveled corners, as these do not represent the true thickness of the panel. Close the caliper jaws firmly but gently against the flat faces of the glass. Take readings at three different points along the edge to confirm consistency.
Standard architectural glass follows specific metric tolerances. You must map imperial measurements to these metric standards to order the correct extrusion.
| Imperial Measurement | Metric Standard | Common Application |
|---|---|---|
| 1/4 inch | 6mm | Framed or semi-frameless bypass doors |
| 5/16 inch | 8mm | Standard frameless swinging doors |
| 3/8 inch | 10mm | Heavy frameless enclosures |
| 1/2 inch | 12mm | Premium structural glass panels |
If your caliper reads 9.2mm, you are likely dealing with a 10mm panel covered in residual limescale, or a specific aftermarket coating. Clean the glass again. If the anomaly persists, round to the nearest standard metric size. Extrusion profiles are manufactured exclusively for these standard dimensions.
The gap clearance dictates the length of the fins or bulbs on your replacement profile. Take gap measurements while the door is in its natural, fully closed resting position. Measuring an open door fails to account for hinge alignment and structural settling.
Evaluating the void for a shower door bottom seal requires careful attention to the floor surface. Shower pans slope toward the drain. Tile floors feature uneven grout lines. Threshold curbs rarely sit perfectly level. Measure the gap between the bottom glass edge and the floor at the hinge side, the middle, and the handle side. Record the largest gap. Your replacement sweep must feature a fin long enough to bridge this maximum distance without buckling under pressure.
When evaluating side or hinge clearances, measure the gap between the active door and the fixed panel or wall. Measure at multiple points. Out-of-plumb walls or slight hinge sag cause the gap to vary from top to bottom. A dynamic measurement strategy ensures you select a profile with enough compression range to seal a tapered gap.
Measure the physical glass edge length to determine your total material requirement. Do not measure the old strip. Thermal cycling causes plastics to shrink over time. The old part is likely shorter than the actual glass panel.
Quadrant enclosures with curved glass require special consideration. Measure the arc length using a flexible tailor's tape directly along the curve of the glass. Curved doors require specialized pre-curved extrusions or highly flexible materials. Standard rigid profiles buckle or snap if forced onto a curved track.
Always add a 10% length buffer to your final order. This allowance accommodates precise on-site miter cuts and future temperature contraction. It is better to trim excess material during installation than to leave a gap at the corner where water escapes.
Once you have your dimensions, match them to the correct profile geometry and material composition. The market offers dozens of variations, each engineered for a specific structural interface.
Different edges of the door require different deflector geometries to manage water flow effectively.
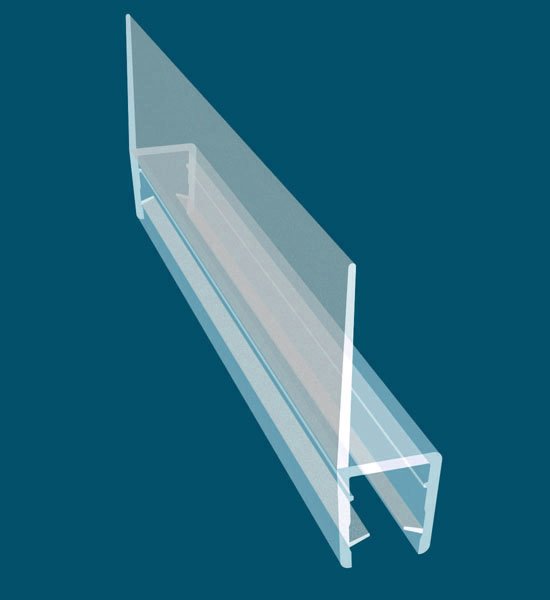
Bottom sweeps and drip rails mount horizontally. They feature angled deflectors designed to catch water running down the glass and channel it back into the shower tray. Side profiles manage vertical gaps. Industry-standard shapes include H-jambs for 180-degree inline panels, Y-jambs for 90-degree corners, and bulb profiles for high-compression hinge sides.
Magnetic closures utilize polarity-matched strips for door-to-door or door-to-wall applications. These provide a watertight lock and keep the door firmly closed against high water pressure. U-channels with overlapping fins work best for sliding doors, maintaining contact as the panels glide past one another.
| Profile Type | Primary Location | Key Function | Best Application |
|---|---|---|---|
| Drip Rail / Sweep | Bottom Edge | Deflects water back into tray | Standard swinging doors over curbs |
| H-Jamb | Side Edge (Inline) | Bridges 180-degree gaps | Door closing against a fixed inline panel |
| Y-Jamb | Side Edge (Corner) | Bridges 90-degree gaps | Corner enclosures and right-angle strikes |
| Magnetic Strip | Handle Edge | Provides active locking force | High-pressure showers needing tight closures |
| Bulb Profile | Hinge Edge | Compresses to absorb door swing | Gaps with variable tolerances or out-of-plumb walls |
Material selection directly impacts longevity and performance. Most modern residential enclosures benefit from a co-extruded PVC shower door seal. Co-extrusion fuses a rigid PVC spine with flexible PVC fins. The rigid spine grips the glass tightly without adhesives, while the soft fins conform to uneven tile surfaces. PVC offers excellent chemical resistance against harsh bathroom cleaners and features anti-microbial properties to resist mold growth.
Polycarbonate serves as a rigid alternative. Specify polycarbonate for high-impact structural applications where the profile must act as a physical door stop rather than just a water barrier. Polycarbonate resists yellowing better than basic plastics but lacks the flexibility needed for uneven floors.
Balance the trade-offs. Flexible fins provide a superior watertight barrier on uneven tile but suffer from mechanical fatigue sooner than rigid fins. Evaluate your specific bathroom environment before choosing a material.
Even with accurate measurements, installation carries inherent risks. Understanding these pitfalls prevents premature failure of your new hardware.
The universal fit marketing claim is a fallacy. Universal profiles attempt to accommodate multiple glass thicknesses using oversized spines and internal gripping teeth. This loose fit allows capillary action. Water wicks up between the glass and the plastic, breeding black mold inside the channel. Always buy size-specific profiles.
Out-of-plumb architecture presents a major risk. If your wall leans, a standard fin might touch the wall at the top but leave a gap at the bottom. Mitigate this by specifying oversized fins. You can manually trim these extended fins with a utility knife to follow the exact contour of your non-square wall.
Forcing straight extrusions onto curved glass guarantees failure. The rigid spine will splay outward, losing its grip on the glass. The tension eventually causes the plastic to crack. Always source specialized curved profiles for quadrant enclosures.
Improper cutting techniques ruin good materials. Using a hacksaw or a dull blade causes micro-fractures in the PVC spine. These fractures expand under thermal stress, causing the profile to split. Use specialized anvil snips or a fine-tooth miter saw for clean, factory-grade cuts.
Sourcing your hardware from a reputable vendor is just as important as measuring correctly. Big-box retail stores often stock generic, low-quality plastics that warp within months.
A credible shower seal supplier provides highly detailed technical documentation. Look for cross-sectional diagrams with exact millimeter dimensions for the spine, the fins, and the internal grip mechanism. If a vendor only provides a blurry photo and a generic size range, look elsewhere.
Assess the vendor's inventory depth. Do they stock specialized profiles for legacy enclosures? Do they have the manufacturing capability to supply a custom shower door seal for bespoke architectural glass? A deep inventory indicates a specialized manufacturer rather than a generic reseller.
Evaluate shipping and logistics. Extruded plastics deform easily. If a supplier ships a rigid sweep coiled tightly in a small box, the plastic retains that memory and never sits straight on your door. Look for suppliers who use rigid shipping tubes to protect the structural integrity of the extrusions during transit.
Analyze their return and warranty policies. Mismeasurements happen. Ensure the commercial terms allow for straightforward returns or exchanges if the profile does not match your specific clearance requirements.
To execute your replacement project, follow these next steps:
A: No. Standard tape measures lack the millimeter-level precision required for architectural glass. The curved blade introduces parallax error, leading to incorrect readings. Always use digital calipers to measure glass thickness accurately. Guessing the thickness results in a profile that either falls off or cannot be forced onto the edge.
A: First, clean the glass thoroughly to ensure limescale or old adhesive is not inflating the measurement. If the reading still falls between standard metric sizes (like 6mm, 8mm, or 10mm), round to the nearest standard size. Extrusions are manufactured exclusively for these specific tolerances. Do not attempt to force a smaller size onto thicker glass.
A: Keep the door in its fully closed, resting position. Use a rigid ruler to measure the gap between the bottom of the glass and the floor at three points: the hinge side, the middle, and the handle side. Record the largest measurement. Order a sweep with a fin long enough to cover this maximum gap.
A: Measure the arc length using a flexible tailor's tape directly along the curve of the glass. You must order specialized pre-curved extrusions or highly flexible materials designed for quadrant enclosures. Standard rigid profiles will buckle, splay, or snap if you try to force them onto a curved track.
A: Yes, thermal cycling from hot water causes PVC to shrink and harden over several years. This is why you must measure the actual glass edge length, not the old plastic strip. Always add a 10% length buffer to your order to accommodate precise on-site trimming and future temperature contraction.
A: Custom profiles are necessary for bespoke architectural glass, unusual thicknesses like laminated glass, or extreme out-of-plumb walls requiring extra-long fins. You also need specialized ordering for legacy enclosures where the original manufacturer no longer produces the proprietary weatherstripping geometry.


