
Views: 0 Author: Site Editor Publish Time: 2026-06-13 Origin: Site


A functional shower sweep acts as your primary mechanical defense against relentless structural water damage. Every day, gallons of water crash against glass panels, searching for an escape route onto your bathroom tiles. Without an effective barrier, escaping moisture quietly rots expensive subfloors and breeds hidden mold behind baseboards. Addressing these invisible vulnerabilities early protects your property value and safeguards your family's health.
At the decision stage, selecting the correct barrier requires matching material thermal thresholds with your daily usage habits. You must also identify precise glass tolerances and understand the distinct operational differences between static sealants and dynamic sweeps. This comprehensive guide breaks down the essential technical criteria for evaluating, selecting, and implementing these crucial components. You will learn exactly how to upgrade your enclosure effectively. Our precise steps ensure you secure a watertight fit without compromising your modern design aesthetics.
Performance Metric: Properly sized seals eliminate up to 95% of escaping water, directly mitigating black mold risks and subfloor rot.
Measurement Dependency: Successful installation requires exact glass thickness measurements (e.g., distinguishing between 3/8" and 1/2" glass) and gap mapping.
Installation Reality: Most modern frameless applications rely entirely on mechanical clamping force—no adhesives required.
Material Lifespan: Seal longevity is inversely proportional to water temperature; high-heat applications necessitate silicone over standard vinyl.
The primary function of any shower barrier involves managing active water flow. Escaping water pooling on smooth bathroom tiles creates severe slip-and-fall hazards. This immediately compromises fundamental bathroom safety for everyone in your household. A seemingly minor trickle quickly transforms a safe floor into a hazardous slip zone.
Environmental health standards further highlight why this daily defense matters. Consistent containment restricts moisture accumulation inside adjacent baseboards and drywall. According to indoor air quality guidelines from the EPA, minimizing stagnant indoor water proves absolutely critical. It prevents severe respiratory hazards directly associated with toxic black mold growth. Stopping water at the threshold serves as proactive health management.
Bottom sweeps act as dynamic, moving barriers. They travel along with swinging doors, actively redirecting heavy water streams back into the internal shower pan. This clever mechanism differs entirely from static silicone caulking. Installers reserve static caulking strictly for stationary glass-to-wall joints or track-to-floor seams. A dynamic sweep physically pushes moisture away from external gaps during active operation. You cannot substitute one for the other.
Polycarbonate and PVC represent the most common entry-level choices for homeowners. They feature a rigid mounting channel paired alongside a flexible lower sweep. You will find them highly cost-effective and remarkably easy to cut to specific lengths. However, they carry distinct performance limitations. These plastics remain highly vulnerable to prolonged UV degradation and high-heat warping from frequent hot showers. Heavy daily use typically causes them to yellow and become frustratingly brittle within one to three years.
Conversely, 100% silicone offers superior, long-lasting resilience. It effortlessly resists extreme temperature fluctuations. This thermal stability makes it the ideal upgrade for high-temperature steam showers exceeding 110°F. Furthermore, pure silicone maintains a crystal-clear aesthetic without turning cloudy or yellowing over time. Its impressive lifespan typically yields three to five years of reliable water-tightness before demanding replacement.
Magnetic seals serve a different architectural purpose altogether. Builders utilize them primarily where two separate glass panels meet in the middle of an enclosure. Think of modern bi-fold or double French door styles. The embedded magnetic strips create an impermeable, magnetically locked barrier during showers. They snap together automatically to block high-pressure sprays.
Material Type | Flexibility | Thermal Resistance | Estimated Lifespan | Best Application |
|---|---|---|---|---|
PVC / Polycarbonate | Medium | Low to Moderate | 1 - 3 Years | Standard budget enclosures |
100% Silicone | High | Excellent (Steam ready) | 3 - 5+ Years | High-end frameless setups |
Magnetic Strip | Rigid edge | Moderate | 2 - 4 Years | Bi-fold or French doors |
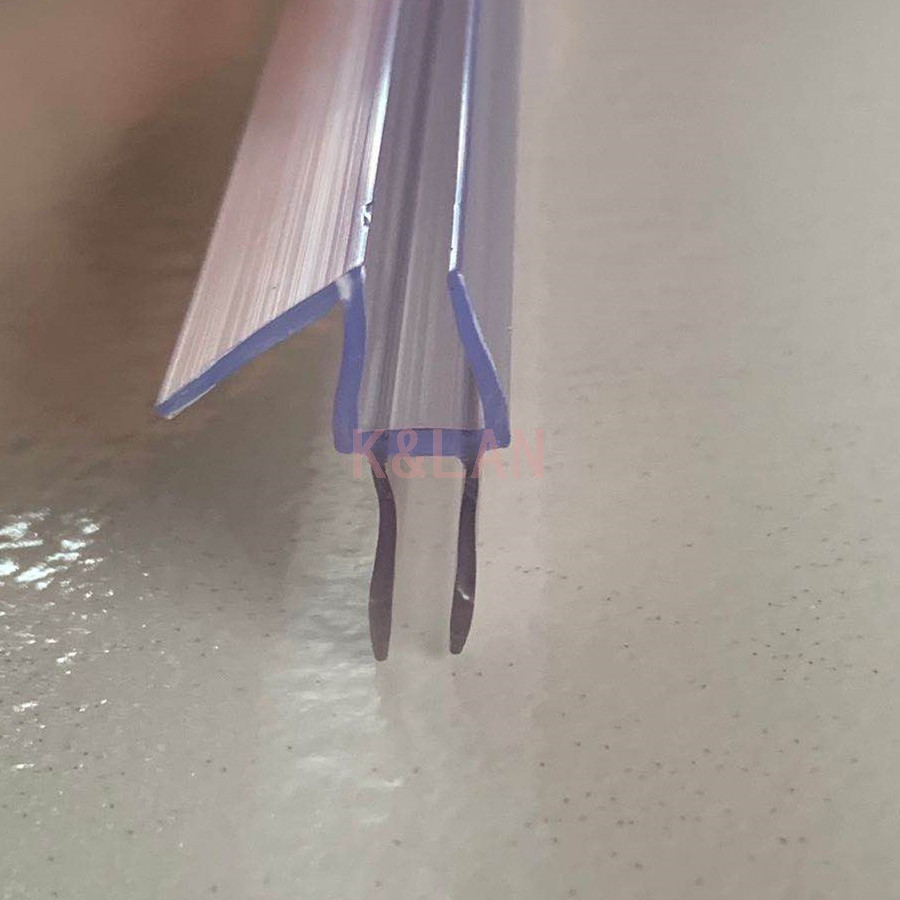
Modern frameless designs demand a completely seamless visual aesthetic. This minimalist architecture requires a simple slip-on fit for all protective hardware. The strip utilizes internal gripping fins to hold fast against the tempered glass surface. You must utilize clear, transparent materials here. Opaque plastics instantly ruin the elegant floating glass illusion. A premium Shower Door Bottom Seal maintains this vital transparency while physically blocking stubborn leaks.
Sliding configurations introduce complex mechanical clearance requirements. Bottom sweeps must never interfere with the delicate lower roller track mechanism. Constant friction quickly damages both the plastic fin and the metal track. This drag forces the user to yank the door, which creates a severe shattering risk. If you supplement the setup using static caulking, follow the golden sealant rule. Apply silicone strictly to the outside perimeter of the bottom track. Sealing the inside traps dirty water beneath the glass panels. This trapped moisture eventually causes hidden door rollers to rust or seize entirely.
Renovating older framed enclosures presents a highly unique sourcing challenge. Finding exact OEM snap-in replacement drip rails proves notoriously difficult today. Manufacturers often discontinue these highly specific vinyl hardware profiles after just a few years of production. However, seasoned contractors utilize a brilliant retrofit solution for this dilemma. You can remove the failing bottom metal rail entirely. This action safely exposes the bare glass edge hidden underneath. By doing this, you effectively convert the bottom edge into a modern frameless setup. The naked glass now freely accepts universally available slip-on plastic sweeps. This smart, inexpensive workaround saves homeowners the immense hassle of replacing the entire door assembly.
Proper fitment entirely dictates barrier performance. Guessing your hardware dimensions guarantees a messy, frustrating failure. You must execute precise measurements to ensure effective leak prevention before ordering any replacement parts.
Glass Thickness Calibration: This represents the most common point of failure for DIY installations. Buyers must use precise digital calipers or a reliable tape measure. You need to verify if the glass measures exactly 6mm, 8mm, 10mm (3/8"), or 12mm (1/2"). Installing a 1/2" channel onto a 3/8" door spells instant disaster. The oversized channel will completely detach during routine door operation, falling to the wet floor.
Threshold Gap Tolerance: You must accurately measure the vertical void between the bottom of the glass and the shower pan. Take this measurement while the door sits in the closed position. The flexible sweep fin must be long enough to gracefully touch the threshold. However, it should not be so excessively long that it causes heavy floor friction. Constant dragging quickly tears the soft lower fin away from its rigid spine.
Edge Anomalies: Always account for custom glass cuts. Some older custom doors feature aggressive bevels or uniquely protruding glass edges. These physical anomalies can easily hinder the rigid plastic channel from seating securely onto the panel. Inspect the bare bottom edge closely before making a purchase decision.
Meticulous preparation ensures long-term hardware longevity. Applying new plastic directly over old grime leads to immediate product failure. Follow these critical implementation steps carefully to achieve professional results at home.
Surface Preparation (The Zero-Residue Rule): Glass must be aggressively descaled and fully dried before application. Use strong white vinegar or a dedicated glass stripper to remove stubborn hard water stains. Residual soap scum acts as a potent, invisible lubricant. It causes the new sweep to easily slide off under everyday 50N pulling forces. You want maximum friction between the clean glass and the internal plastic fins.
Precision Cutting Tools: Avoid crushing the delicate plastic channel during length modification. Use a fine-tooth hacksaw to gently cut through the rigid gripping spine. Then, promptly switch to heavy-duty scissors or a sharp utility knife. Use these softer tools to safely trim the flexible bottom fin without creating jagged edges.
Friction Management: Sometimes an exact-fit sweep resists sliding onto perfectly clean glass. Do not force it forcefully with a hammer or heavy mallet. Instead, apply a very small drop of liquid dish soap inside the plastic channel. This trick acts as a highly effective, temporary lubricant. It degrades harmlessly during your very next shower, leaving the grip perfectly secure.
Thermal Expansion Gap: When cutting your final length, intentionally leave a 1/8-inch gap at both the hinge and handle sides. Hot water causes bathroom plastics and glass to expand rapidly. This crucial horizontal gap space prevents the plastic barrier from bowing outward when exposed to steamy, high-temperature showers.
Even highly seasoned DIYers occasionally encounter unexpected installation hiccups. If water still pools dangerously on your floor after a fresh installation, review these common culprits immediately. Effective door bottom sealing requires strict attention to channel orientation and complex flooring conditions.
Reversed Orientation: The deflector fin—often called the primary drip edge—must physically face the inside of the shower pan. Installing it backwards remains the absolute leading cause of post-installation leaks. A backwards edge effectively scoops running water directly onto your dry floor instead of repelling it inward toward the drain. Always double-check the profile angle before pressing the seal fully onto the glass.
Floor Pitch Anomalies: Sometimes a tiled bathroom floor has a harsh, uneven slope built into it. The door might swing freely at first, but stick sharply at wider opening angles. Do not force the glass aggressively over the elevated tile. Instead, trim only the flexible bottom fin at a perfectly matching gradient. This custom cut accommodates the uneven flooring perfectly without compromising the structural integrity of the main rigid channel.
Over-Caulking Errors: Many nervous beginners attempt to apply sticky silicone adhesive inside a mechanical slip-on sweep. Avoid this massive mistake completely. Glue provides absolutely no extra waterproofing inside a dynamic, moving channel. It strictly complicates your future replacements by leaving hardened residue on the glass. Furthermore, it creates dark, inaccessible crevices where trapped shower moisture actively breeds stubborn mold. Trust the engineered mechanical grip of the internal friction fins to do their job.
Upgrading your shower enclosure barriers serves as a surprisingly high-ROI home maintenance task. It actively safeguards your foundational bathroom infrastructure from silent, immensely expensive water damage over the years. Success relies strictly on precise thickness measurements and proper material selection for your specific heat usage. Complex tooling or specialized contractors are rarely necessary for this straightforward project. By accurately mapping your door configuration and strictly adhering to clean-surface installation practices, you can successfully restore structural water-tightness in mere minutes.
Always measure your glass thickness accurately with reliable tools before proceeding to procurement. Guessing leads directly to material waste and continued leaking. Take decisive action today to inspect your current sweeps. Replace any brittle, yellowing plastics immediately before they fail completely and compromise your pristine bathroom floors.
A: Depending on daily water temperature, material choice (vinyl vs. silicone), and overall usage frequency, most standard seals degrade and require replacement every 1 to 3 years. Severe hard water buildup accelerates this timeline significantly by turning flexible plastics permanently brittle.
A: No. High-quality frameless seals are purposefully designed with internal tension fins. These clever fins provide a highly reliable mechanical grip against clean glass. Using adhesives is highly discouraged, as it traps dirty moisture and severely complicates future maintenance tasks.
A: The flexible sweep fin is either too long for your door's unique threshold gap, or your shower floor features an aggressive, uneven tile pitch. You can carefully trim the soft bottom fin with heavy-duty scissors to permanently accommodate the uneven flooring.

